Installing a B-hyve device to manage your watering is easier than you may think and can be completed by anyone. No need for electrical wiring experience or any fancy tools, it’s super simple! Here’s how to get yours set up.

Gather Your Tools
To start, it’s important to have the tools you need close at hand when you go to install your device. For a wall-mounted device, you’ll need a Phillips screwdriver and the mounting hardware provided in the box. For a hose timer, you’ll just need the timer and the applicable Wi-Fi Hub.

Plug In Your Device
For wall-mounted devices, plug in your device in your garage or wherever you’ll be mounting it.
It’s important to do this before mounting to the wall to ensure your Wi-Fi signal is strong enough to connect. You can connect to your Wi-Fi. If you are having trouble connecting, please see our troubleshooting video.
For hose timers, simply plug the hub into an outlet and ensure you can connect.

Check Your Wi-Fi Connection
Next, check to make sure your device can connect to the internet.
Download the B-hyve app, which has an icon that looks like a hexagon with a lowercase B in the middle.
Follow the step-by-step instructions to set up your account – make sure you have your Wi-Fi password with you.
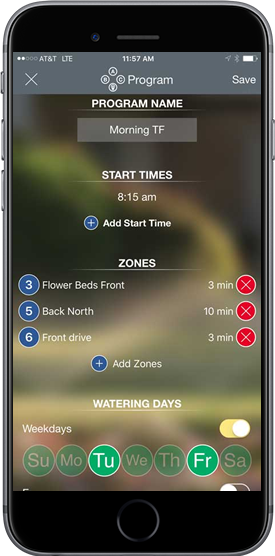
Once the B-hyve app is installed, follow the step-by-step instructions to set up your account – make sure you have your Wi-Fi password with you. Then you will be automatically taken to the “Getting started” tab. Go to “Devices”
Follow the connection process and accept Bluetooth permissions so the B-hyve app can find your timer. This may ask you to update the firmware, do so if prompted. Once you are on the latest version you’re ready for the next step.

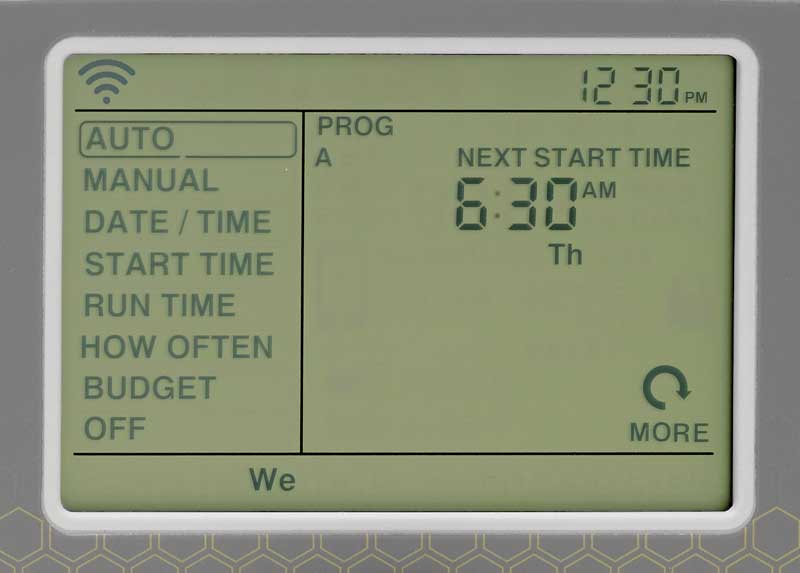
Mount Your Timer
Now that you’re connected, you’re ready to mount your timer to the wall for wall-mounted devices, or connect it to your hose faucet for hose timers.
Hose timers are finished with installation at this point, and you can move on to programming.
For wall-mounted devices, it’s time to wire up your timer.

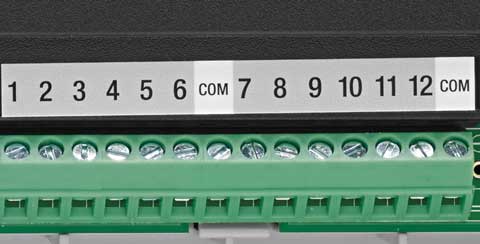
Wiring Your Timer
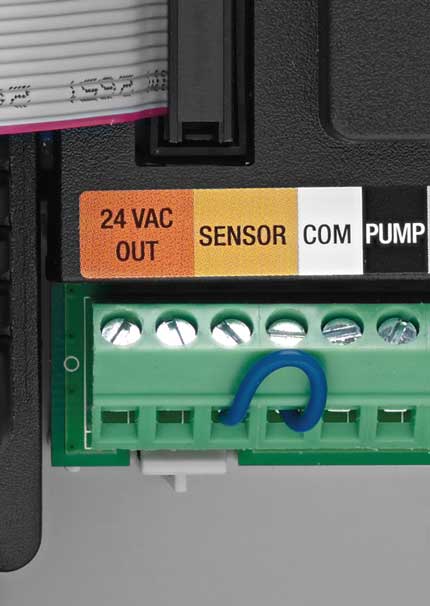
PLEASE ENSURE YOU UNPLUG YOUR DEVICE FIRST BEFORE WORKING WITH ANY OF THE WIRES. A LIVE WIRE IS A SIGNIFICANT HEALTH & SAFETY RISK.
If you are replacing a previous timer, take a picture of the wiring before disconnecting the old timer, as it will help with this next step.
Connect each valve wire to its respective zone, ensuring that each valve is connected to the common wire. Make sure your common wire is connected to the correct terminal. Watch the video to see in more detail how this looks.
If you’re using a rain sensor, connect it now. If not, ensure the jumper is connected to both terminals.
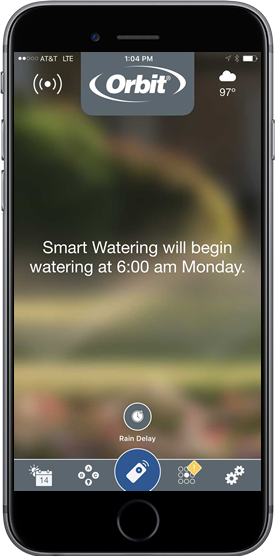
Your B-hyve timer is now installed and ready to configure!